Payment Request Schedule
The Payment Request Schedule provides a central location to view all active payment requests for the current tax year and review amounts due. Data such as due date, return description, payee name and address, and payment amount flow automatically from the return. User-entered information, including Vendor Number, General Ledger account numbers and names, check numbers, and date paid, must be added manually.
Data entered on the schedule flows to individual payment requests on the return, and changes made on the return update the schedule. Copy and paste can be used to populate recurring values, such as General Ledger account numbers and descriptions, which will update the corresponding payment requests.
This schedule can also be exported to an text or csv file for import into your accounts payable system.
Steps to Export Payment Requests
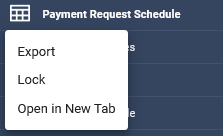
- Right-click on the Payment Request Schedule in the tree and select Export. This opens the Export Payment Request window.
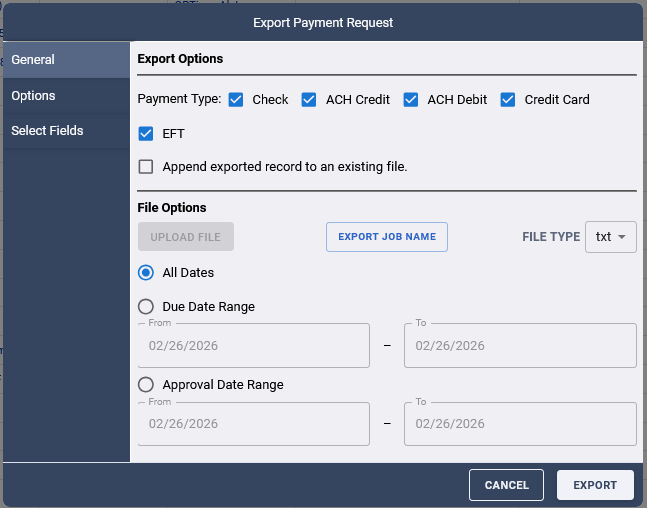
- Select General from the navigation options on the left.
- Choose the Payment Types you want to export: Check, ACH Credit, ACH Debit, Credit Card, or EFT.
- (Optional) To append exported records to an existing file, check the Append exported records to an existing file box. This enables the Upload File button under File Options, which you can use to select the file to which the records will be appended.
- Choose whether to export all unpaid payment requests regardless of their dates, or to export only requests within a specific date range based on Due Date or Approval Date. If selecting a range, enter the From and To dates using the calendar icons.
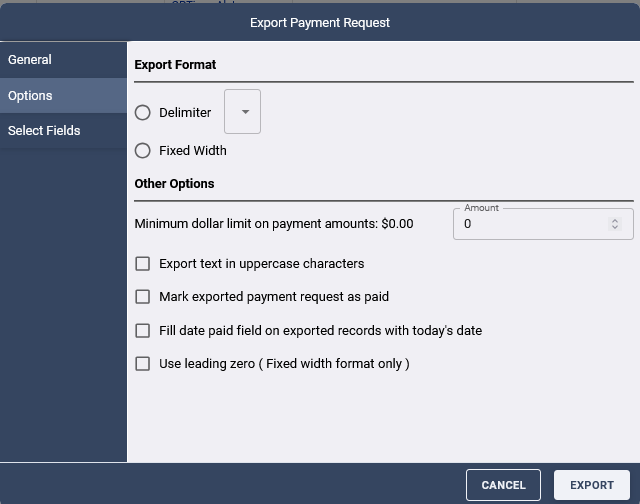
- Click Options on the left and choose the Export Format: Fixed Width or Delimited.
- If you chose Delimited, select the delimiter character (such as comma or tab) from the drop-down list.
- If you chose Fixed Width, a new Fixed Width section appears in the navigation pane. After selecting your options and columns, click this section to assign the starting character position for each column. This is the final step before exporting when creating a fixed width file.
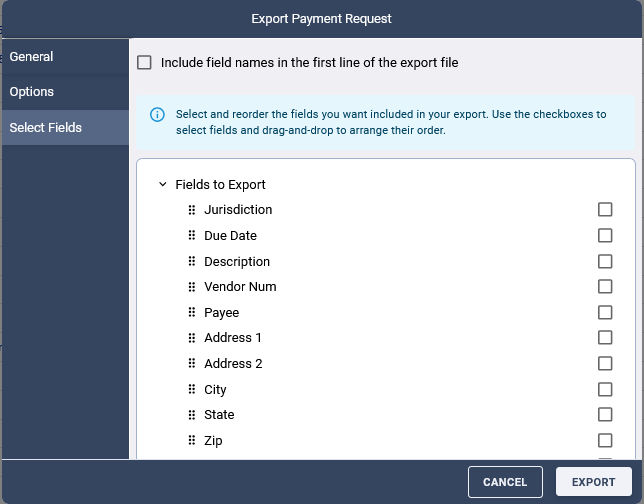
- Click Select Fields. You may choose to include field names in the first line of the export file, which can serve as column headers when importing into a spreadsheet.
- By default, only the Jurisdiction Name and Amount Paid fields are exported. To add more fields, check their boxes in the Available Fields list and use the arrow buttons to move them into the Fields to Export list.
- When all selections are complete, click the Export button at the bottom of the window to generate the export file.